Boost Landing Page Conversions with a Countdown Timer
Give visitors a clear, visible reason to act now instead of "later." Create a countdown timer that matches your landing page design and embed it next to your call to action in under two minutes — no coding required.
Create a Countdown Timer FreeWhy Use a Countdown Timer on Landing Pages?
A landing page exists to convert one visit into one action: a signup, a purchase, a registration. The most common reason visitors leave without converting is not objection — it's deferral. "I'll come back to this" is the silent conversion killer, and most visitors who defer never return.
A countdown timer attacks deferral directly. When the offer has a real deadline — a price that goes up, a bonus that expires, a registration that closes — the timer makes that deadline visible and concrete. The visitor no longer has to imagine when the window closes; they can see it ticking.
A visible deadline turns a vague future decision into a present one, reducing the "I'll decide later" drop-off.
When visitors can see exactly how much time remains, the cost of missing the offer becomes tangible.
Deadlines compress decision time. Visitors who would have bounced and forgotten convert inside the window instead.
How Countdown Timers Increase Conversion Rates
Countdown timers work through three well-documented behavioral mechanisms:
- Loss aversion. People weigh losing an available discount or bonus more heavily than gaining an equivalent one later. A timer frames inaction as a loss.
- Decision compression. Without a deadline, the decision can be postponed forever. A deadline forces the evaluation to happen while your page — and your pitch — is still in front of the visitor.
- Specificity and trust. "03:12:45 remaining" is more credible than "limited time only." A concrete number signals a real rule rather than vague pressure language.
The lift you actually get depends on your offer and your traffic, which is why the right approach is to A/B test a timer variant against your current page and measure the difference on your own data. The mechanism only works when the deadline is real: if the timer expires and nothing changes, returning visitors learn to ignore it. The psychology behind countdown timers explains these dynamics in more depth.
Step-by-Step: Add a Countdown Timer to Your Landing Page
Step 1: Create Your Countdown Timer
Open the builder to create a countdown timer: set the deadline that matches your offer terms, add a short title, and pick a theme. Customize colors and fonts so the timer looks native to your landing page rather than bolted on — a timer that matches the design reads as part of the offer, not an ad.
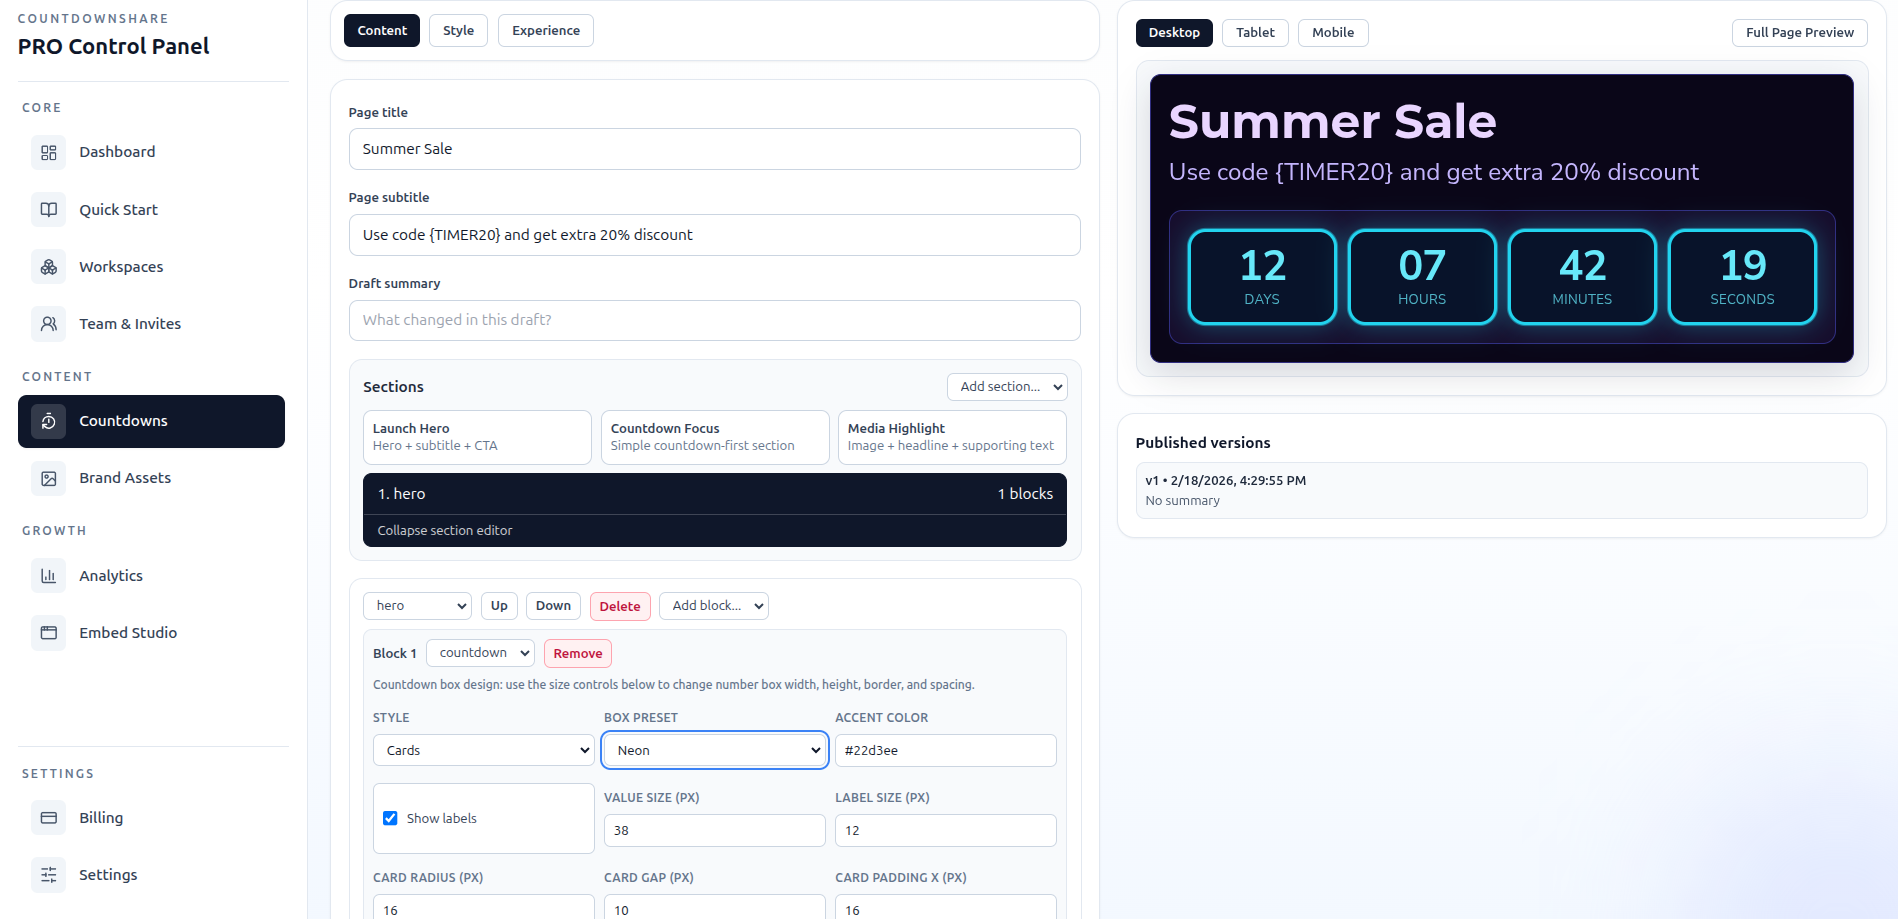
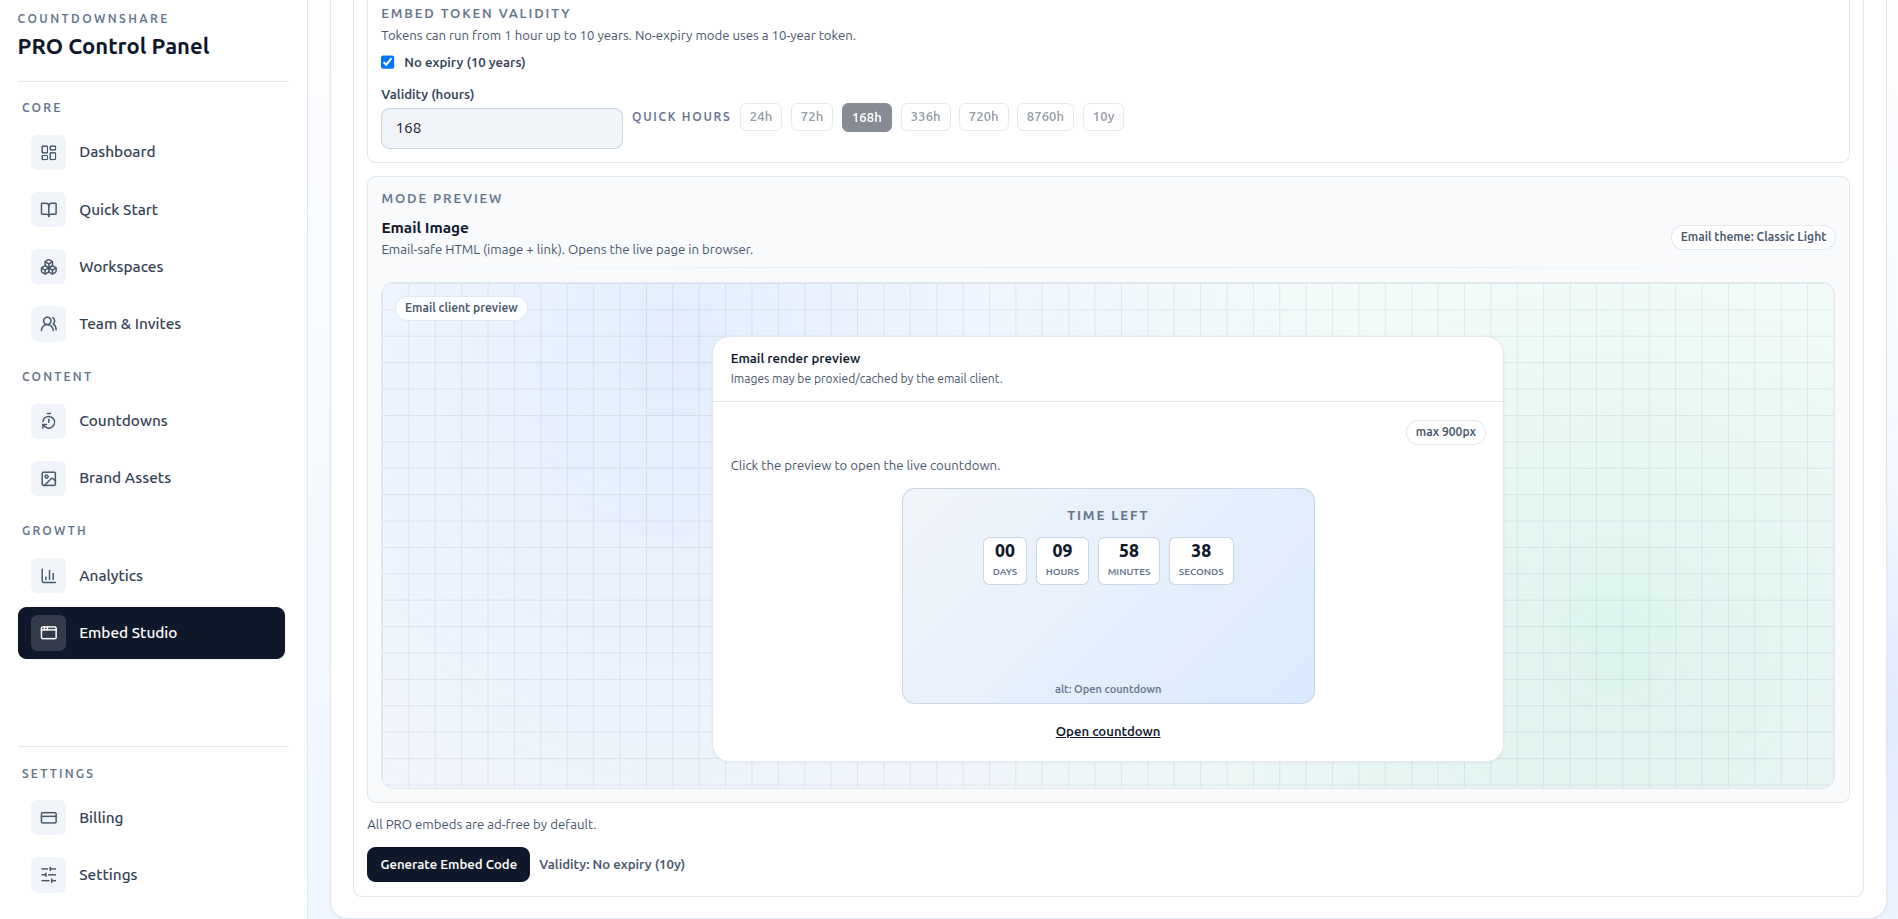
Step 2: Copy the Embed Code
Click the embed button to open the embed studio. CountdownShare generates a responsive HTML iframe snippet with your timer ID already filled in. Copy it — that single snippet is everything your landing page builder needs.
Step 3: Paste It Into Your Landing Page Builder
Every major landing page builder accepts custom HTML:
- Unbounce: drag in a Custom HTML element and paste the snippet.
- Instapage / Leadpages: use the HTML widget.
- Webflow / Framer: add an Embed element and paste the code.
- WordPress, Wix, Squarespace: use the Custom HTML block or embed element of your editor.
Place the timer directly above or beside your primary call-to-action button so the deadline and the action sit in the same visual cluster.
Step 4: Preview and Publish
Preview the page on desktop and mobile — the timer is fully responsive, but check that it doesn't push your CTA below the fold on small screens. Confirm the deadline matches the offer terms stated on the page, then publish. The countdown is live immediately and stays synchronized for every visitor in every timezone.

Best Practices for Landing Page Countdown Timers
Placement: next to the CTA
The timer should support the action, so keep it in the same visual cluster as the form or button. On long pages, repeat it once near the final CTA.
Design: native, not noisy
Match the timer colors and fonts to your page. One timer per page — competing deadlines dilute each other and confuse the visitor.
Messaging: name the consequence
One sentence next to the timer should say exactly what changes at zero: "Early-bird pricing ends when the timer hits zero."
Honesty: honor the deadline
When the timer expires, the offer must actually change. Use a redirect or expiry message rather than silently resetting the clock.
Duration: match the decision
Low-cost offers work with hours; higher-ticket decisions need 48–72 hour windows. Use evergreen timers for always-on ad traffic.
Testing: measure the lift
Run the timer variant against a control in your A/B testing tool. Track conversion rate and revenue per visitor, not just clicks.
Before & After: What Changes When You Add a Timer
Here is the pattern conversion teams typically see when a real deadline is made visible on a landing page:
Before: static offer
- - "20% launch discount" sits in the headline with no end date.
- - Visitors read, feel mild interest, and leave to "think about it."
- - Retargeting has to do all the work of bringing them back.
- - The offer feels permanent, so there is no cost to waiting.
After: visible deadline
- - The same discount now shows "ends in 23:14:09" beside the CTA.
- - The decision happens during the visit, while the pitch is fresh.
- - Copy names the consequence: price returns to standard at zero.
- - Returning visitors see their real remaining time, keeping the deadline credible.
Webinar registration pages, SaaS trial offers, course enrollments, and pre-order pages all follow this same structure: the timer doesn't replace the offer — it makes the cost of deferring the decision visible. To verify the effect on your own page, run an A/B test and compare conversion rate and revenue per visitor between the two variants.
Copy-Paste Embed Code for Your Landing Page
Paste this snippet into the HTML or embed element of your landing page builder. Replace your-timer-id with the ID from your own timer:
<iframe src="https://countdownshare.com/embed/your-timer-id" width="400" height="200" frameborder="0" allowtransparency="true" loading="lazy" style="border: none; display: block; max-width: 100%;"></iframe>Create a countdown timer to get the embed code with your timer ID filled in automatically.
FAQ: Landing Page Countdown Timers
How do I add a countdown timer to my landing page?
Create a free timer on CountdownShare, copy the embed code, and paste it into an HTML or embed element in your landing page builder. The timer works in Unbounce, Instapage, Leadpages, Webflow, Framer, WordPress, Wix, Squarespace, and any builder that accepts custom HTML. No coding or plugin is required.
Where should the countdown timer go on a landing page?
Place the timer directly next to the element it supports — usually the signup form or the primary call-to-action button. Visitors should see the deadline and the action in the same glance. For long pages, repeat the timer once near the final CTA so the deadline is visible at the decision point.
Do countdown timers actually increase landing page conversions?
A countdown timer increases conversions when it represents a real deadline: a price change, a closing registration, an expiring bonus, or limited availability. It makes the cost of waiting visible and turns "maybe later" into a decision. A timer with no real consequence behind it tends to be ignored — and can reduce trust. Always A/B test the timer variant against your control to measure the lift on your own traffic.
Will the timer slow down my landing page?
No. The timer loads in a lightweight, lazy-loaded iframe served from CountdownShare, so it adds no render-blocking scripts to your page and does not affect your page speed scores in any meaningful way.
Can I use an evergreen countdown timer on a landing page?
Yes. An evergreen timer gives each visitor their own personal deadline — useful for always-on campaigns where traffic arrives continuously from ads or search. For shared deadlines like a launch or webinar, use a fixed-date timer so every visitor sees the same time remaining.
Can I track how the countdown timer affects conversions?
Yes. CountdownShare Pro includes timer analytics so you can see views and engagement on your countdown, and you can combine that with your landing page analytics or A/B testing tool to measure the conversion impact of the timer directly.
Want the strategy side? Read the landing page urgency countdown guide for campaign planning, or the guide to diagnosing conversion blockers if your page is getting traffic but not converting. For deeper customization and tracking, the Pro features include custom branding, ad-free countdown pages, and timer analytics.
Ready to Add a Countdown to Your Landing Page?
Create a free countdown timer in 30 seconds — no signup required.